


Why I baked my wedding cake, regardless of everyone telling me not to
Why I baked my wedding cake, regardless of everyone telling me not to
And why you should give it a try


When my now-sister-in-law first asked me to create their wedding cake, I was struck with a mix of excitement and sheer panic. At the time I was a self-taught baker who mostly did cupcakes in my free time, but decided to take the challenge regardless of my baker impostor syndrome. It wasn’t an easy task, mainly because I couldn’t find books on the subject in Chile, so I referred to my absolute cooking guru: Pinterest. After many trials and more than a few tears later, I came up with the final version. I made a chocolate and caramel cake with red fruit compote and a Swiss meringue buttercream adapted from a Martha Stewart recipe she had on her website. Jumping into the unknown with a vertiginous tier cake seemed daunting, but after that experience when a friend would get married my gift was always the wedding cake.
I tend to feel uninspired by registry wedding gift lists and spending time baking the cake for that special day always feels special and more intimate.
With their sculpted sugar flowers and fondant as smooth as clay, professional wedding cakes are engineered to look good, but they can fall short in flavour. A more personal homemade cake subverts expectations and can feel less formal in the best possible way: flavourful, exuberant and celebratory. This was always my aim and when it was my time to get married the first thought I had was what flavour of cake I should bake.
When I told people I wanted to bake my wedding cake the looks I got were priceless (I wished I had a camera to prove it now). Everyone telling me I was mad made me doubt, but now after I did it I think that if you have ever baked you can do it as well.
It wasn’t stressful, it was the moment I felt more relaxed, probably because I knew what I was doing and planning the wedding didn’t feel as natural to me as baking does.
However, I know I am a Pastry Chef, but if you have some experience baking and have a friend getting married please offer them to bake their cake and don’t feel discouraged. Maybe when you get married give it a try too. It might seem daunting to do a multi-layered cake, but it is easier once you break it down into smaller, manageable tasks on a schedule. Everything in this recipe can be refrigerated for days and some can be frozen so you don’t have to rush.
On the big day, the cakes can be frosted and transported unstacked to reduce anxiety-inducing bumpy car rides. The cake can be later assembled and decorated on-site. Elegant, edible decorations can be added at the end ideally with no rush and some nice music so you feel serene.
Our wedding cakes
I got married in Ralún, a place in the middle of nowhere in the south of Chile, where I have the fondest memories of my childhood and summers next to the cold Pacific Ocean, surrounded by nature. This place used to be a super fancy hotel back in the ‘70s, until the ‘90s when there was a big fire that destroyed most of the hotel. Despite the flames burning everything, luckily, the kitchen remained intact. Everything in the kitchen is still from the ‘70s, so I planned to bake as much as possible in a “modern” kitchen I knew and then only finished assembling and doing the buttercream and adding flowers. I did two trials in my kitchen in Cambridge before deciding on the final flavours, I wanted to make two medium-sized cakes, instead of a huge one because of our low-key wedding.


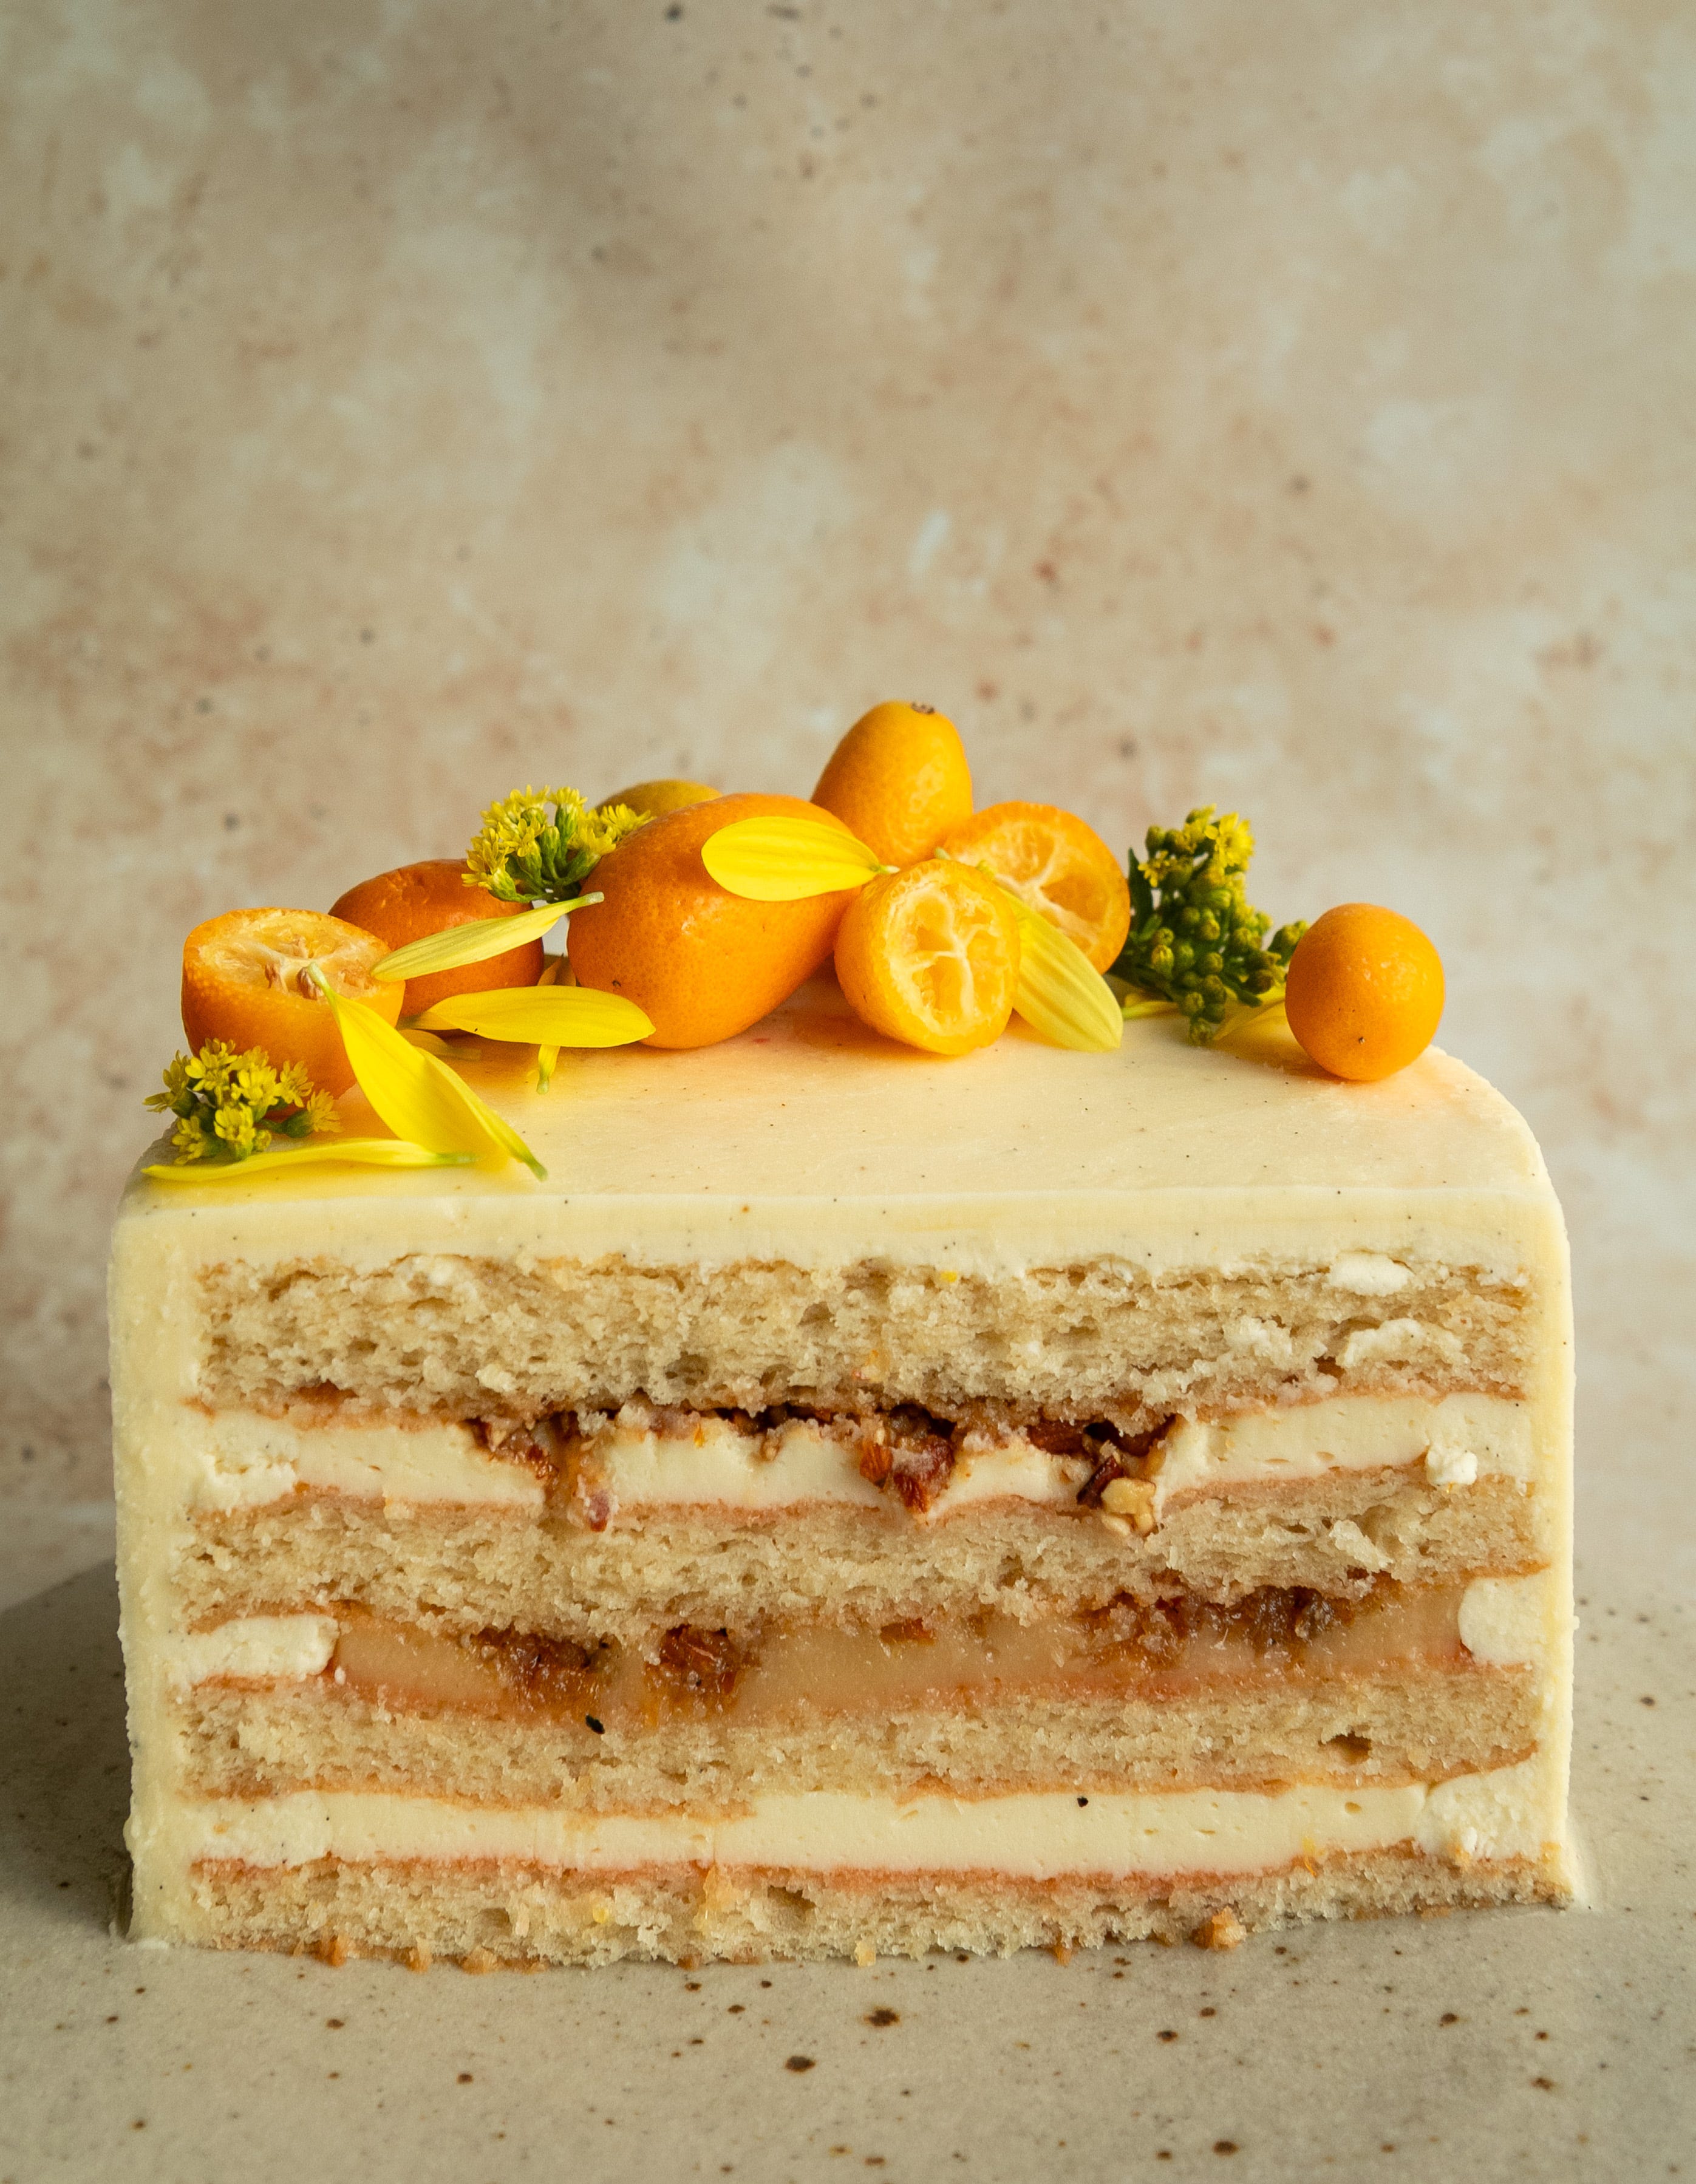
After doing two trials and some adjustments I nailed my favourite flavours: a chiffon layered cake with a yuzu and olive oil curd, charred citrus compote, toasted almond crumble and yuzu swiss meringue buttercream for the two-layered one. The second flavour was a chocolate sponge, soaked with pisco syrup, manjar, chocolate ganache and hazelnut praline.


I started one week before the wedding, making my list of components, labelling containers and storing everything from soaks to cakes in the fridge. I had to think ahead of time, because I was getting married in a different place, far from where I was baking. On top of that, many obstacles came. I caught a nasty virus that week while still recovering from a recent hand surgery (but that is another story). I persevered and baked the sponges in my parent’s kitchen, making all the fillings except the buttercream. The buttercream had to be done on-site, so, I took my Kitchenaid mixer on a 1.059 km car ride (yes, Chile is long). We were getting legally married on Friday and the celebration was on Saturday, so I planned to finish everything on Thursday. Of course, that turned out to be impossible, so Friday night was the night. Everyone chipped in, our wedding was everything DIY, so friends and family came hands-on and helped us doing the flowers, decoration and lighting.
Friday night while the rain was pouring we were all inside each doing their own thing, while I frosted the cake, I felt serene and proud with my decision.


I assembled the layers with the fillings two days before the wedding day. The night before, I made two batches of buttercream, iced the cakes and stored them in the fridge. On the day of the wedding, it was still raining but not a crazy amount and we decided to decorate with some fairy lights outside. While my partner was busy assembling the lights, I was feeling a bit nervous so I decided to chill and bake strawberry galettes, because why not! I baked the galettes in the 70’s kitchen old-school oven and then decorated the cake with foraged flowers. I was gutted the next day when I realised I never actually took pictures of the finished cakes… but luckily the photographer took some at night.


Yuzu and Almond Wedding Cake
Chiffon Sponge
Ingredients
13 large eggs
240 grams of neutral oil
2 tbsp vanilla extract
780 grams caster sugar
480 grams of plain flour
3 tbsp baking powder
2 tsp sea salt
Method
Preheat oven to 170C. Line the cake tins (I used two 26 cm round cake tins).
Divide the egg whites from the yolks and transfer the whites to a stand mixer. In a different bowl mix the yolks with 240 grams of water, the oil, vanilla and sugar, and whisk until smooth.
In a large bowl, mix flour, baking powder and salt. Pour the yolk mixture into the dry ingredients and gently stir to combine.
Using the whisk attachment, beat egg whites in the stand mixer on medium-high speed until a soft peak forms. With the mixer running, stream in the remaining sugar and whisk until a glossy meringue forms.
Scrape one-third of the meringue into the yolk mixture and gently fold with a spatula until the mixture is loosened. Add the remaining meringue and fold until everything is incorporated. Divide batter evenly among prepared pans. Smooth the surfaces evenly with an offset spatula and transfer to the oven, (I baked it in 4 batches for a home oven).
Bake until centres of cakes spring back to the touch and edges are lightly golden, about 20 minutes. Let cakes cool completely in pans until ready to use. The cakes, tightly wrapped can be refrigerated for up to 1 week, or frozen for up to 1 month.
Charred citrus compote (recipe from Natasha Pickowicz)
Ingredients
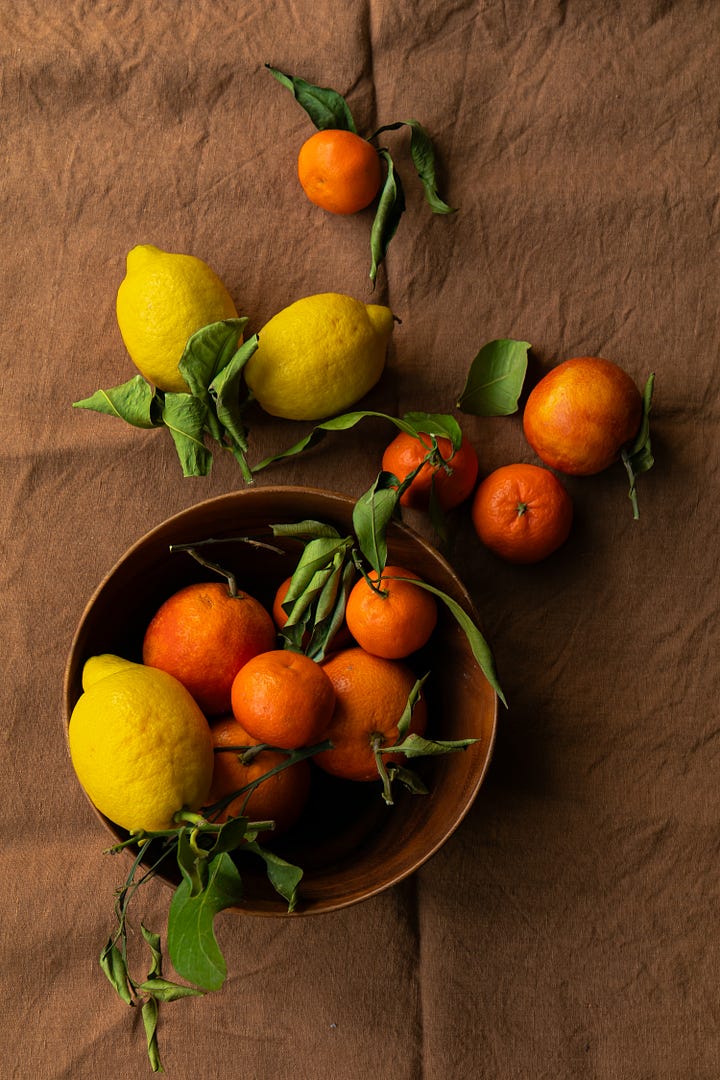
2 large oranges
3 lemons
280 grams of caster sugar
1 tsp citric acid
Method
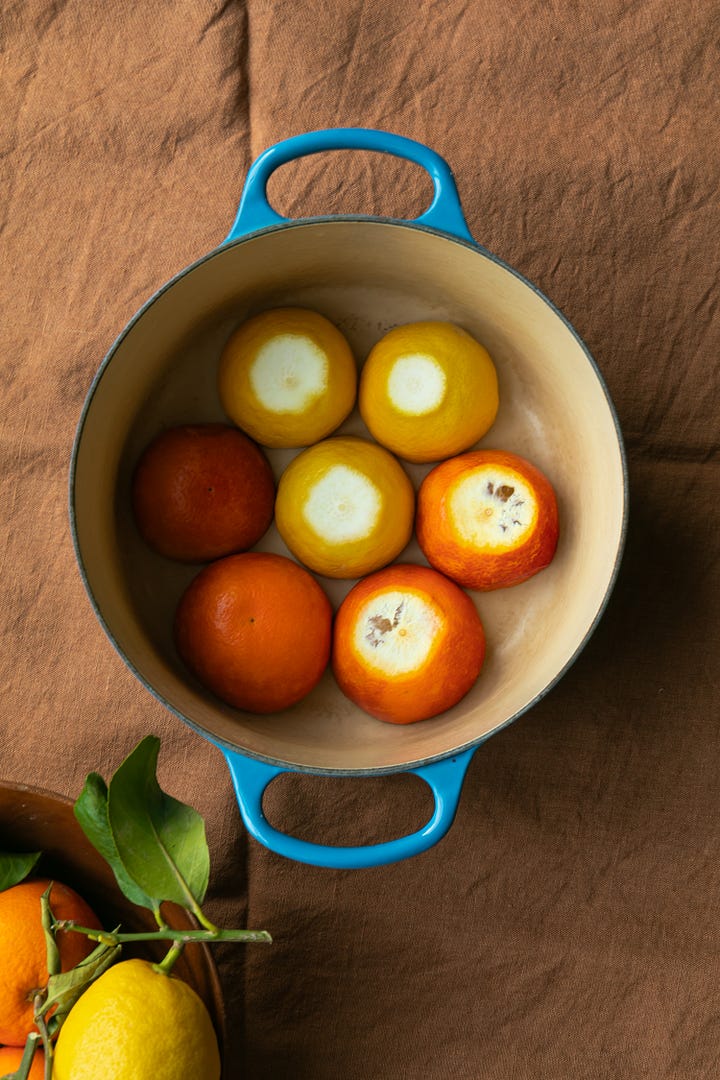
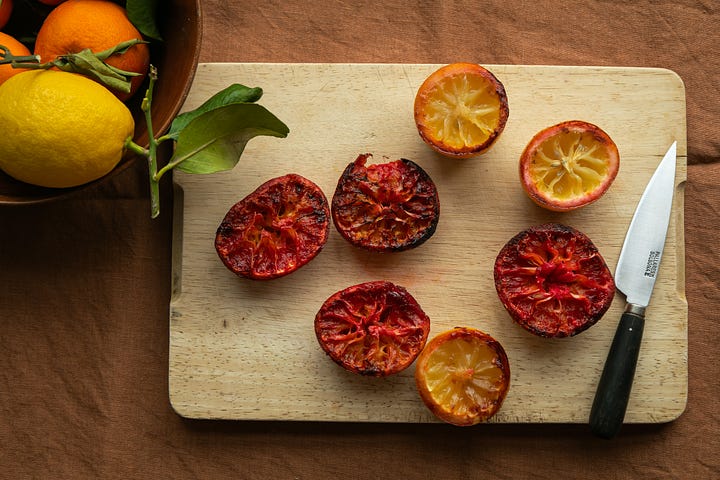
Wash the oranges and lemons. Cut half crosswise. In a large pot add fruit, cut sides down, over medium-high heat. Let sear, undisturbed, for about 10 minutes, until the cut sides of the fruit are blackened. Use tongs to flip each piece and continue to cook for another 10 minutes, until the peel is softened.
Transfer the fruit to a cutting board to cool. Add 8 cups water to the pot, scrape the bottom and bring water to a simmer.
Peel the fruit, and reserve citrus segments. Roughly chop peels. Add the chopped peels to the simmering water until the peels are tender (15 to 20 minutes). Drain peels in a colander and discard the water. Press citrus segments through a strainer into a small bowl and set the juice aside.
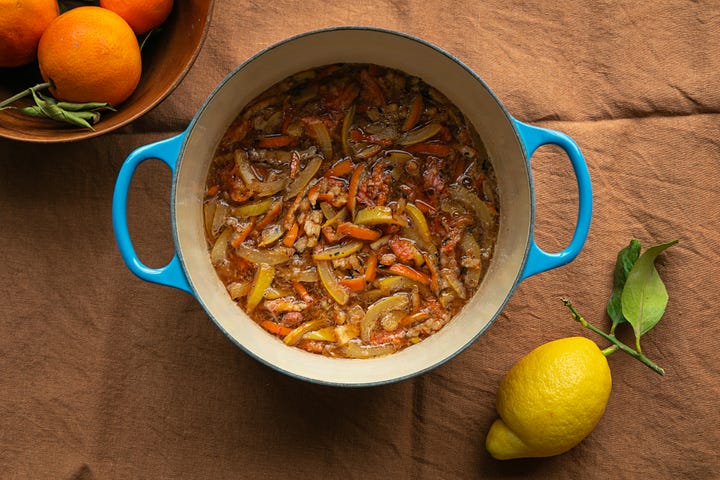
Transfer the pulp in the strainer to the pot, and add the sugar, cooked peels and 240 grams of water. Bring to a simmer over medium-low heat and cook, stirring occasionally, until mixture is thickened and saucy, about 30 minutes.
Remove from heat and use an immersion blender until the mixture is smooth. Stir in citric acid. Let cool completely. The compote can be stored in an airtight container in the refrigerator for up to 2 weeks.


Yuzu and Olive Oil Curd
Ingredients:
120 grams of yuzu juice or any citrus 🍊
180 grams caster sugar
2 tsp of cornflour
100 grams of eggs (2 eggs)
40 grams of egg yolk (2 egg yolks)
70 grams of extra-virgin olive oil
Method
Combine the yuzu juice and 140 grams of sugar with a whisk, bring to a light simmer and take out of the fire.
Whisk together 20 grams of sugar and corn flour. Add the hot yuzu syrup and mix, pour into a saucepan and cook for one minute to thicken.
Combine eggs, egg yolks and the remaining sugar. Whisk well and add the yuzu, sugar and cornflour mixture, always whisking. Transfer everything to a saucepan and stir constantly until the mixture has thickened enough (85C) or until it is thick enough to coat the back of a spoon.
Pass the mixture into a clean bowl and slowly, while whisking add the olive oil until combined. Cover the mixture directly with a wrap and store in an airtight container in the refrigerator for up to 1 week.
Toasted almond crunch
Ingredients
150 grams of almonds
100 grams of light brown sugar
40 grams of water
1 gram of merkén (chilli powder)
Method
In a medium saucepan combine almonds, sugar and water. Boil over medium heat until the water evaporates.
The mixture will look sandy and white. Reduce the heat and continue mixing with a wooden spoon, nonstop. After 10 minutes, the sugar will melt again and caramelise, let it caramelise evenly and coat all the almonds, breaking any clumps of sugar or almonds.
Once they are fragrant, add the merkén. Transfer the almonds to a silicon mat, on a single layer, leaving them to cool down. Once cold grind them (I used a pestle and mortar to maintain the crunch).
You can make them in advance and freeze them for up to three months.
Swiss Meringue Buttercream Yuzu Edition
Ingredients
6 large egg whites (230 grams)
400 grams of caster sugar
340 grams of unsalted butter, softened but still cool and cut into small cubes
2 tsp yuzu juice
Pinch of sea salt
Method
Add egg whites and sugar to a stand mixer bowl or other large heatproof bowl and set over a medium saucepan of steaming water over low heat. (The water should not touch the bottom of the bowl.) Whisk continuously until the sugar is completely dissolved and it feels slightly warm.
Remove the bowl from the pot and pour into the stand mixer with the whisk attachment. Whisk on medium-high speed until the mixture has cooled slightly. Mix in yuzu and salt.
Check the temperature of the meringue with a clean fingertip: It should be room temperature. With the mixer on medium speed, add butter, piece by piece, until fully incorporated, then increase speed to medium-high and whisk until smooth and fluffy, another 3 to 5 minutes.
If the buttercream looks runny, refrigerate for 10 to 15 minutes to cool and then beat again until it is spreadable. The buttercream can be refrigerated in an airtight container for up to 2 weeks, or frozen for up to 1 month. If frozen, thaw overnight in the refrigerator, then bring to room temperature before use.
Cake decoration and frosting
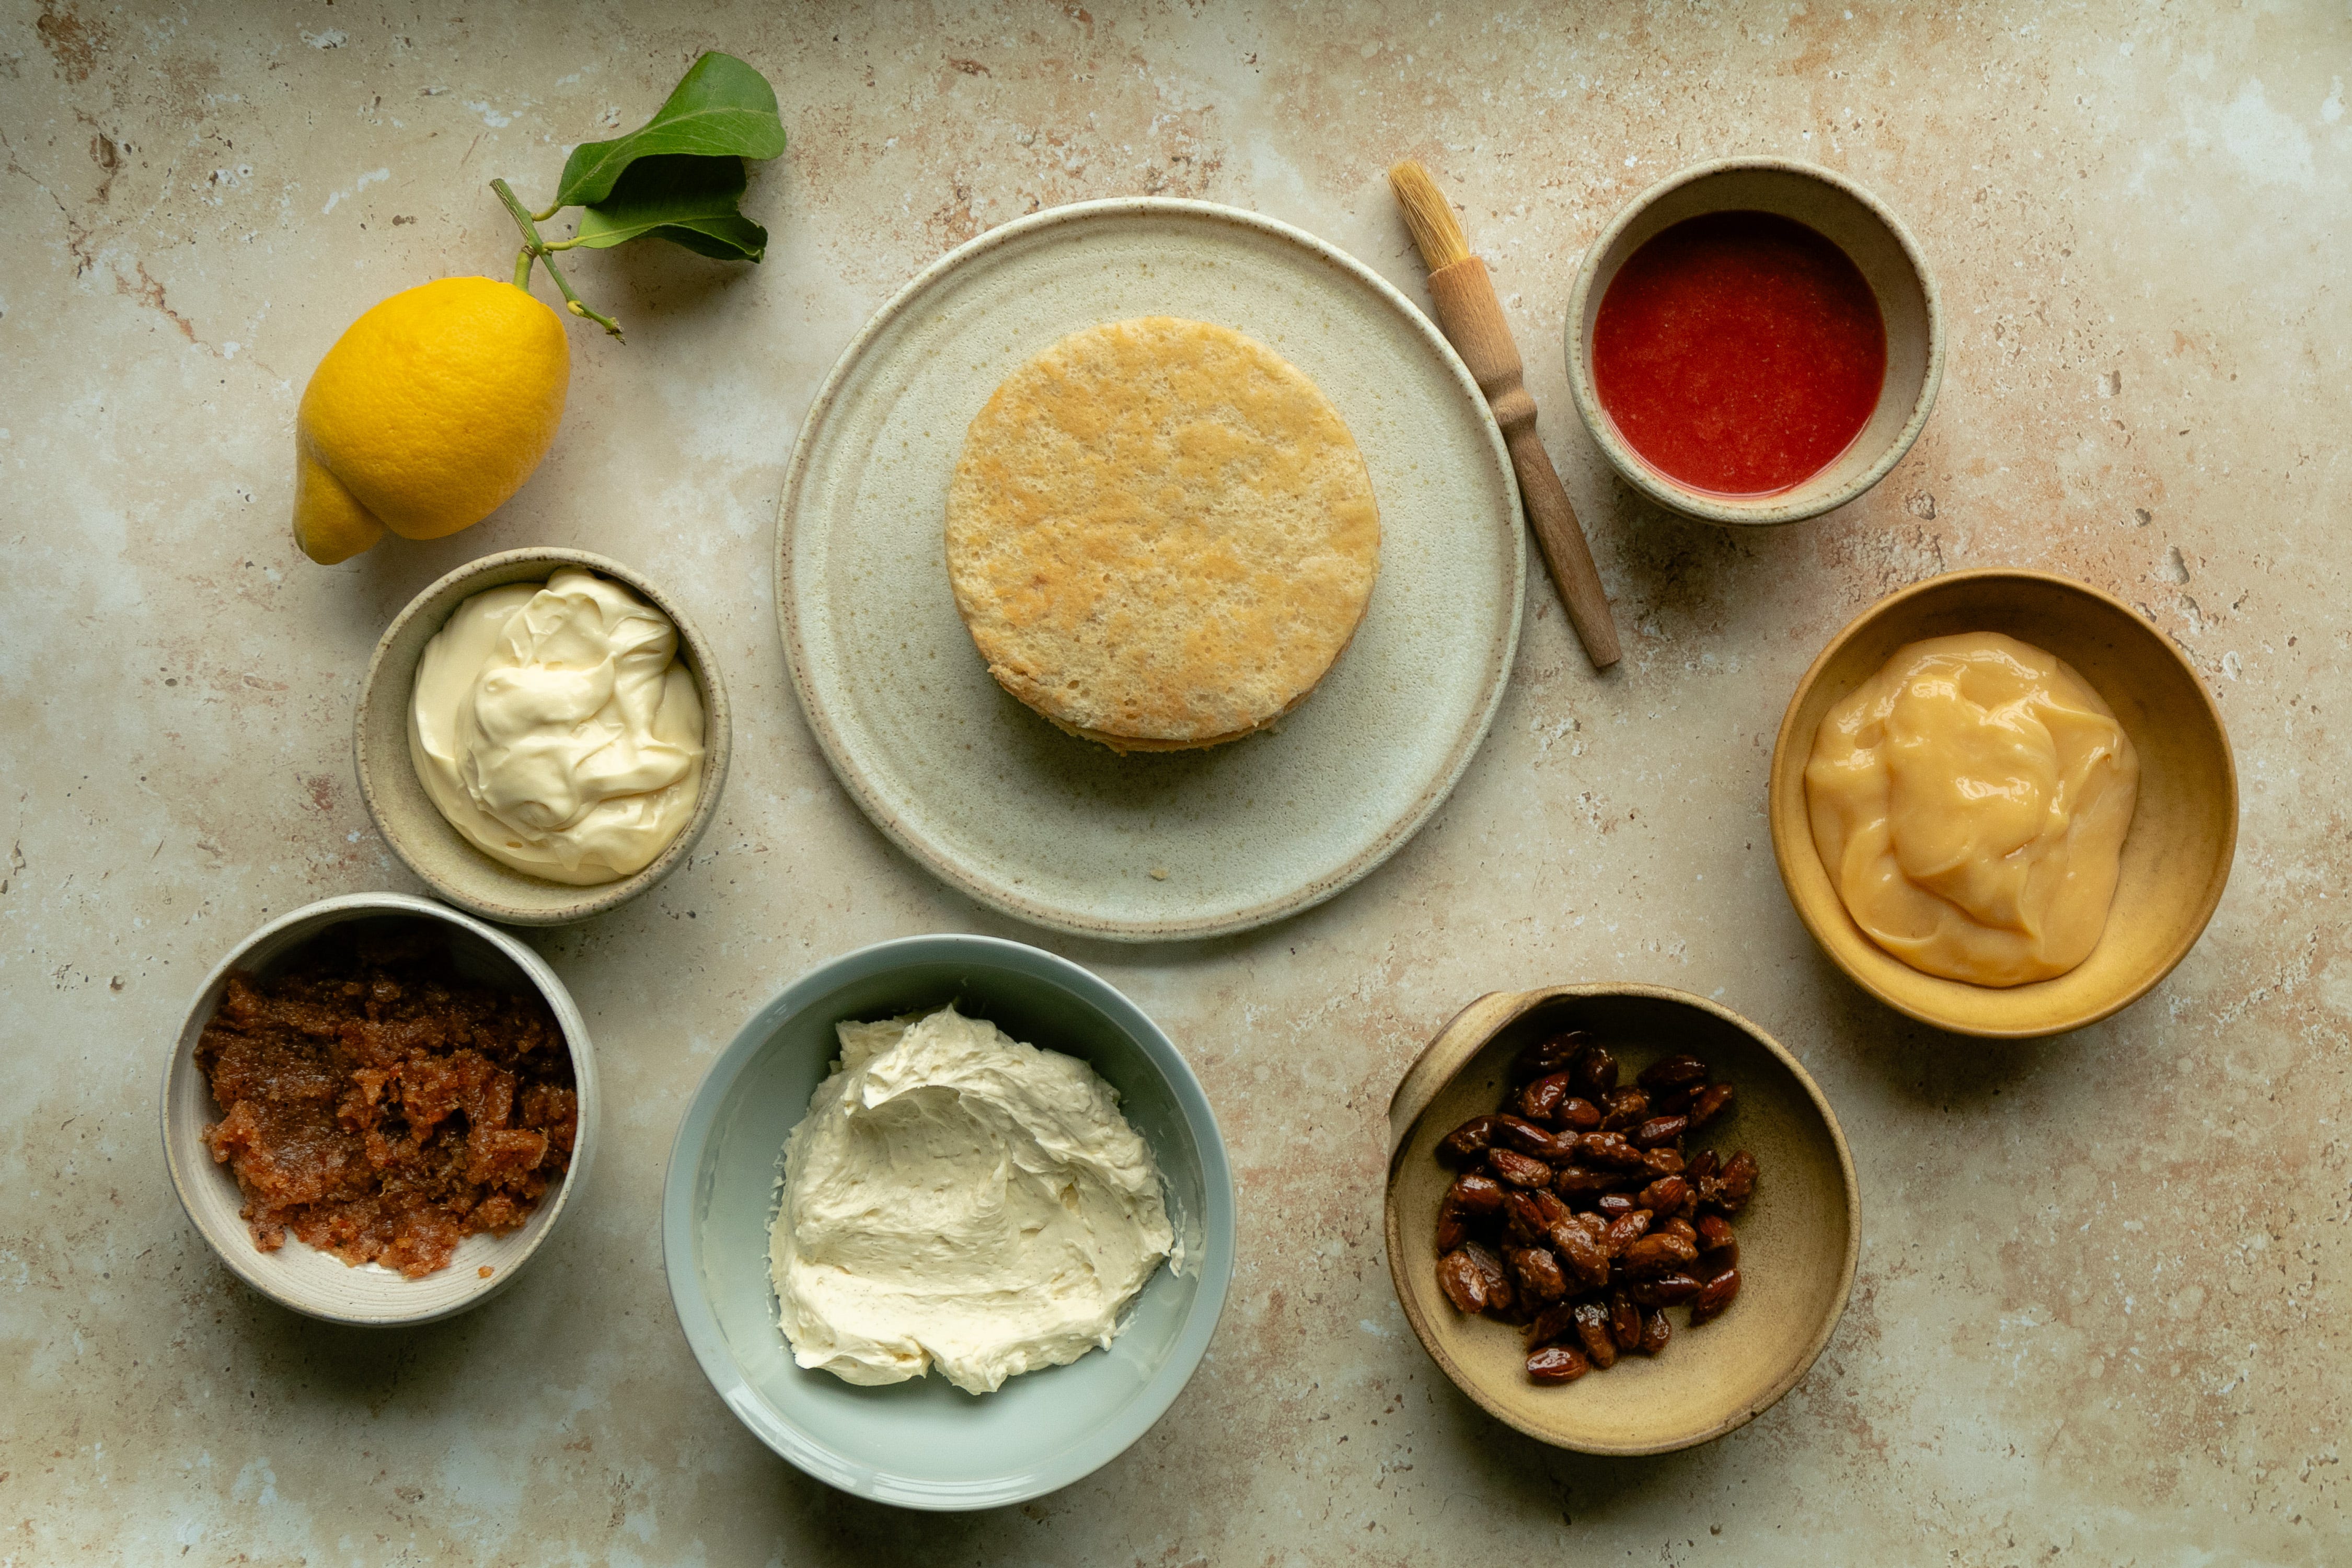
Cut the chiffon layers and with a pastry brush soak the sponge with the citrus juice. Pipe a round layer of the buttercream so the filling doesn’t spread.
Pipe a layer of the yuzu olive oil curd, and repeat the soak with every layer and the buttercream edge. In the next layer add the compote and the almond crunch.
Repeat until you have the height you want. Refrigerate for three hours.
Once the buttercream is creamy and spreadable coat the cake with a layer of buttercream until it is uniform. Add enough buttercream to coat the cake and decorate.
The same day add edible decorations, such as flowers, fruits or nuts.
Let me know if you bake this cake as a gift to someone. Spread the buttercream and the joy!